SetHarbour Help & Support
Find practical help for using SetHarbour, from getting started and logging workouts to editing history and troubleshooting. This page is structured as a lightweight support guide, so real screenshots and richer walkthroughs can be added later without redesigning it.
Jump to a section
Use these links to go straight to the guide area you need.
Getting Started
The basics for installing SetHarbour, checking compatibility, and understanding how your data is stored.
Where can I download SetHarbour?
Overview
SetHarbour is available on the Google Play Store. Search for 'SetHarbour' or 'Harbour Apps' to find it. The app is free to download.
Step-by-step
- 1
Open the Google Play Store on your Android device.
- 2
Search for SetHarbour or Harbour Apps.
- 3
Open the app listing and install the latest version.
What devices are supported?
Overview
SetHarbour runs on Android devices using Android 8.0 (Oreo) or later.
Step-by-step
- 1
Open your device settings.
- 2
Check your Android version in the About section.
- 3
Update the device if available before installing the app.
Do I need an account to use the app?
Overview
No. SetHarbour works offline and does not require an account. Your workout data is stored locally on your device.
Step-by-step
- 1
Install the app.
- 2
Open it and begin using it without signing in.
- 3
Keep in mind that local device data should be backed up where relevant.
Offline support is useful for training in gyms with poor signal or when you simply want a more private setup.
Logging Workouts
Guidance for starting sessions, recording sets clearly, and using timing features while you train.
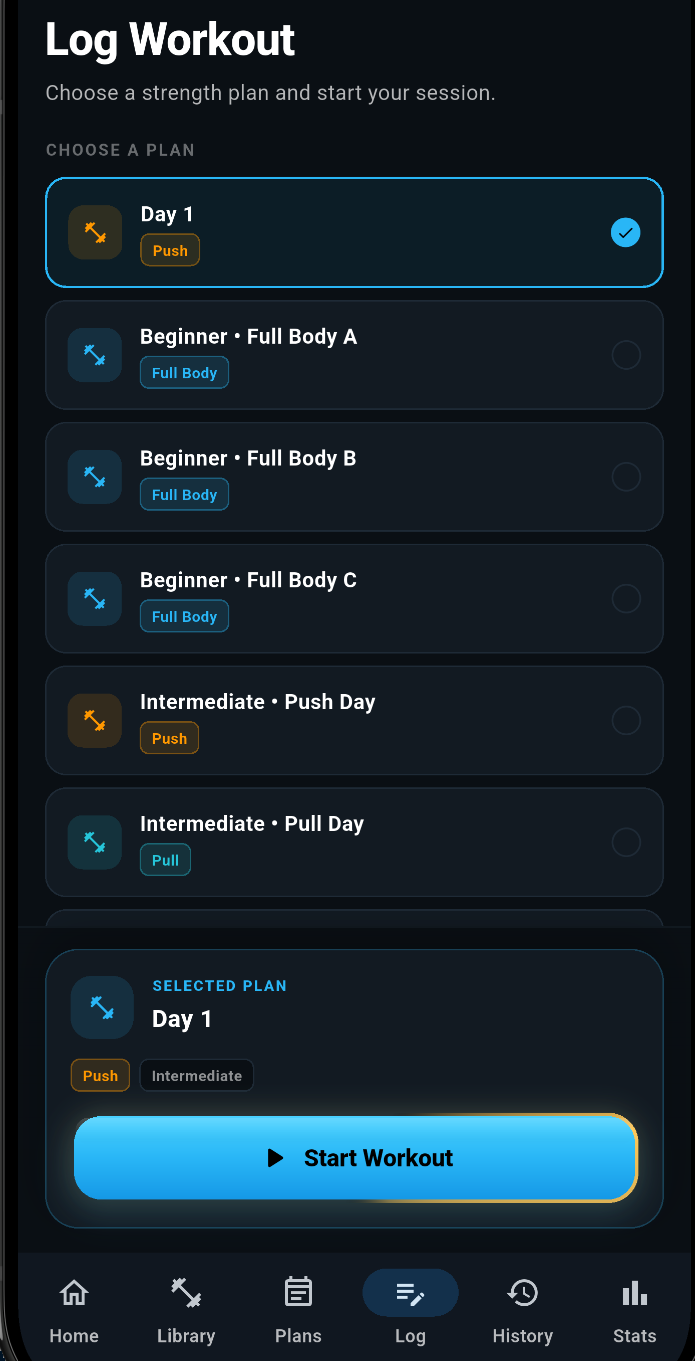
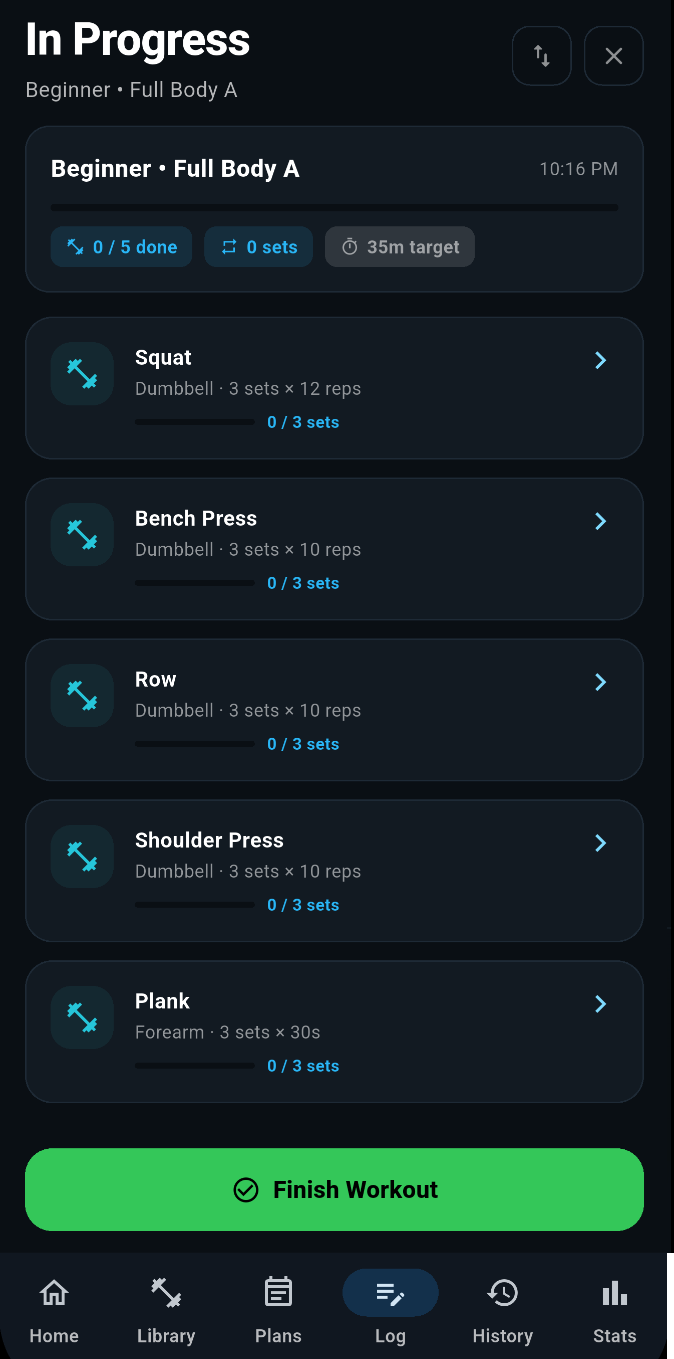
How do I log a new workout?
Overview
Logging a workout should feel quick and repeatable. Start a session, add your exercises, record sets, and save when you are done.
Step-by-step
- 1
Tap Log from the bottom menu.
- 2
Tap Start Workout.
- 3
Select the exercise you want to perform.
- 4
For each exercise, enter your sets, reps, and weight as you go.
- 5
Check the entered sets and the bottom of the exercise screen.
- 6
Tap done to return to the exercise select screen
Screenshots

Tip
If you tend to repeat similar sessions, logging becomes faster once your common exercises are already in use.
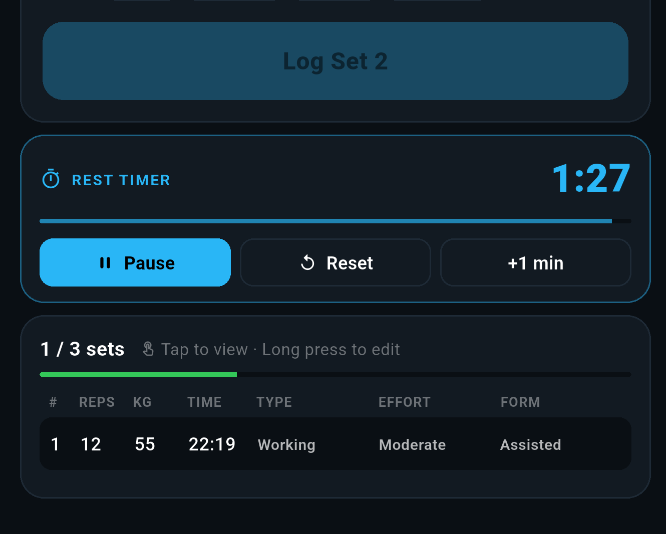
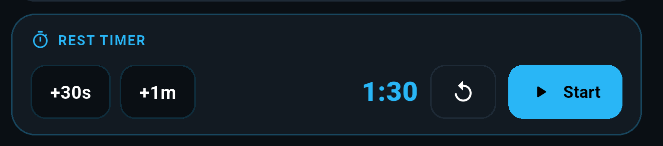
How does the rest timer work?
Overview
The rest timer helps you manage recovery between sets. It can be used to keep workouts moving without relying on a separate timer app.
Step-by-step
- 1
Complete a set during your workout.
- 2
The timer start automatically if that option is enabled in Settings.
- 3
Timer counts down and can be paused, reset or extended.
- 4
Adjust rest timing in the app settings if the default duration does not suit your training.
- 5
Resume the next set when the timer finishes or when you are ready.
Screenshots
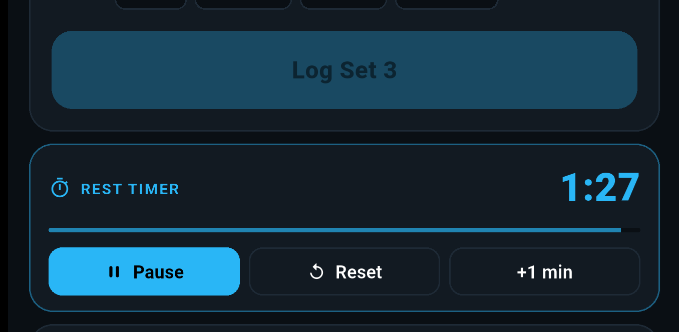

Tip
Shorter rest works well for lighter accessory work, while heavier compound lifts often need longer recovery.
What should I do if something does not behave as expected during a workout?
Overview
If something looks wrong while logging a session, it is best to pause and check a few basics before continuing.
Step-by-step
- 1
Check that the value you entered was saved correctly.
- 2
Refresh your view by moving back and reopening the workout if needed.
- 3
Confirm you are using the latest app version from the Play Store.
- 4
Make a note of exactly what you were doing when the issue appeared.
- 5
Contact support if the issue keeps happening.
Tip
The most useful support reports include the exact action you took just before the issue appeared.
Exercises & Plans
Help with creating exercises, building structure into your training, and preparing the page for richer plan-based guidance later.
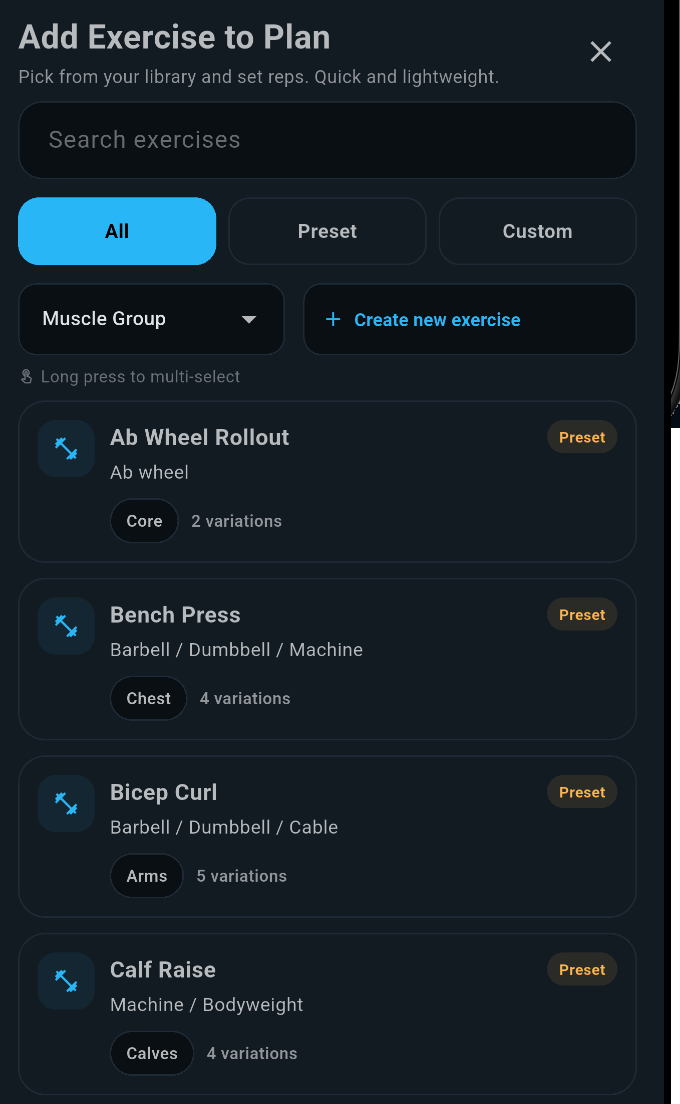
Can I create custom exercises?
Overview
Yes. If the exercise you want is not already available, you can create your own custom entry and use it in your workouts.
Step-by-step
- 1
Open the Library area.
- 2
Choose the option to add or create a custom exercise.
- 3
Enter a clear exercise name.
- 4
Assign a category if the app provides one.
- 5
Save the exercise and then add it to your workout.
Screenshots

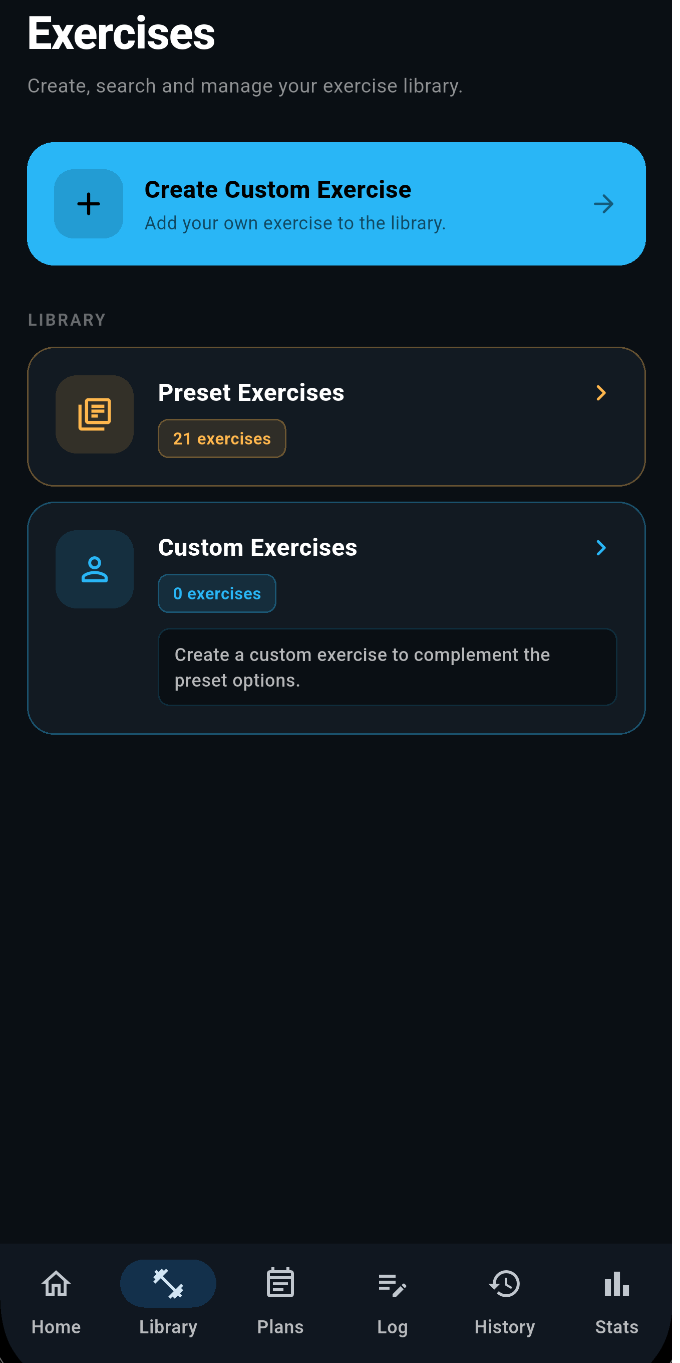
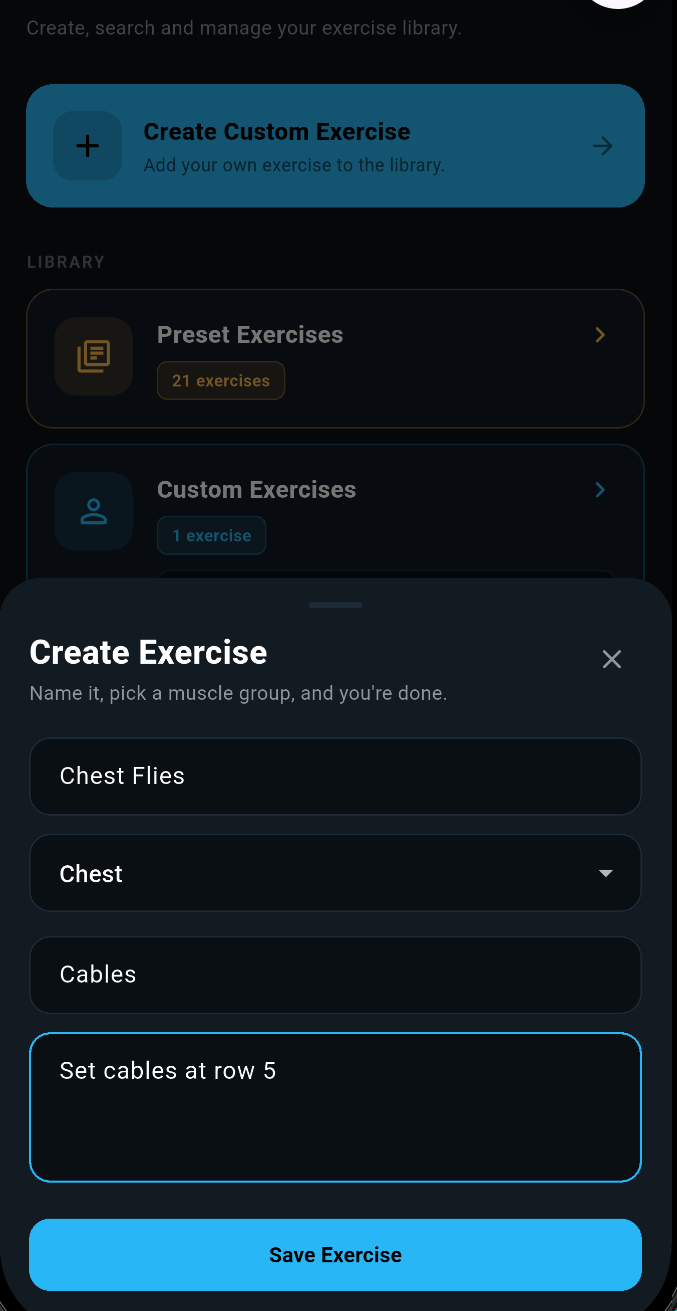
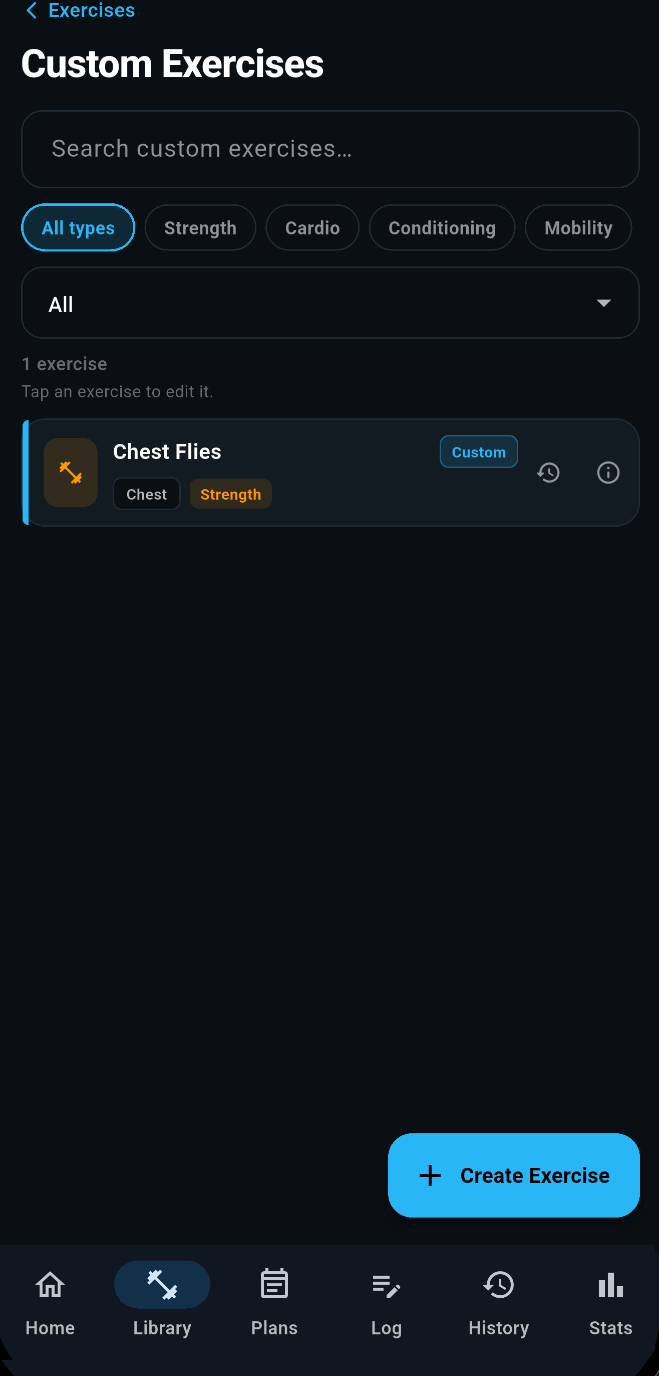
Tip
Use clear names you will still understand weeks later, especially if you track exercise variations.
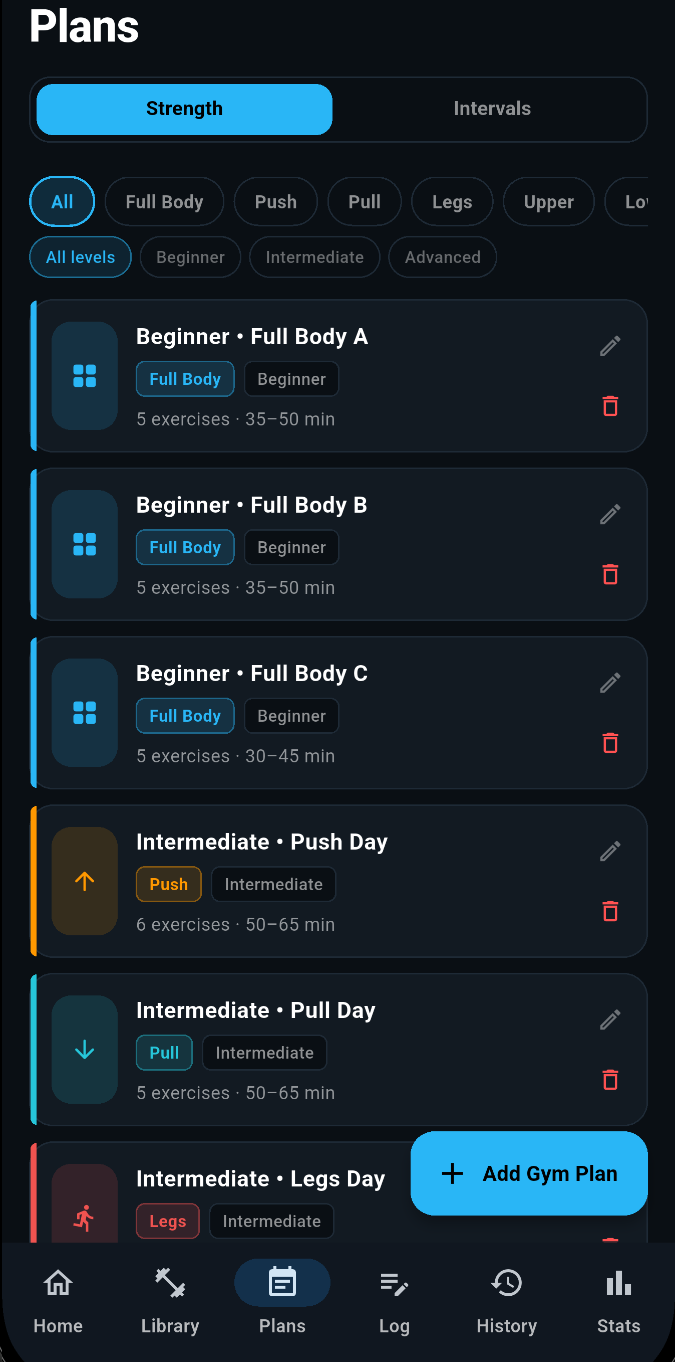
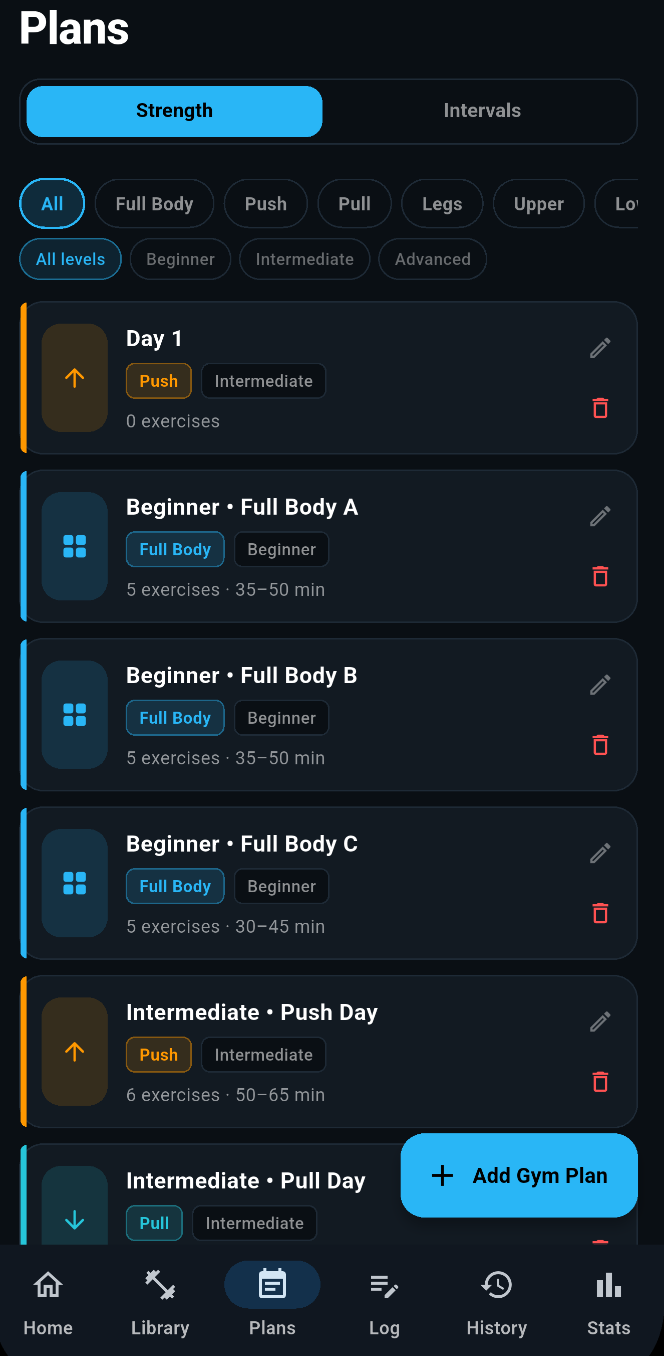
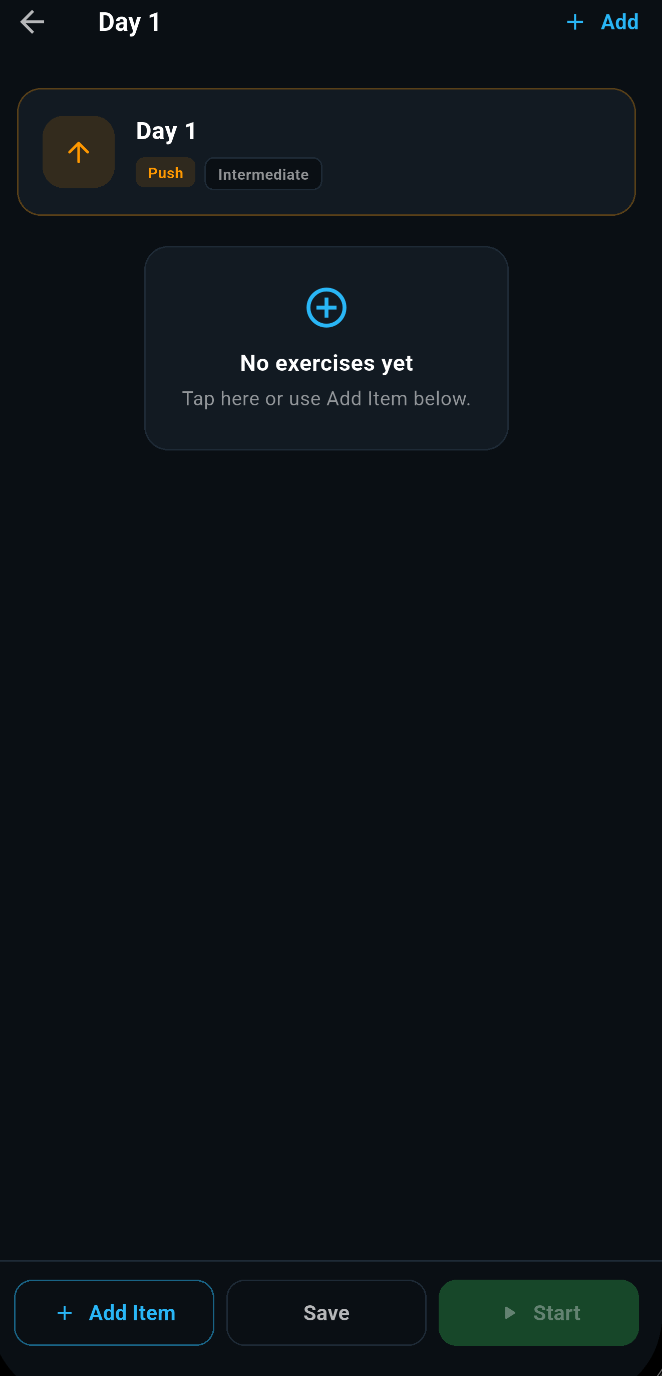
How do I create a workout plan?
Overview
A workout plan helps you organise repeatable sessions rather than building everything from scratch each time.
Step-by-step
- 1
Open the plans area in the app.
- 2
Tap Add Gym Plan and give it a clear name.
- 3
Select the new plan and add exercises in that plan.
- 4
Arrange them in the order you normally perform them.
- 5
Save the plan and use it as the basis for future workouts.
Screenshots

Tip
Simple plans are easier to maintain. Start with a basic split or a repeatable full-body session and refine it later.
History & Editing
Review previous sessions, make corrections where needed, and keep your training record tidy.
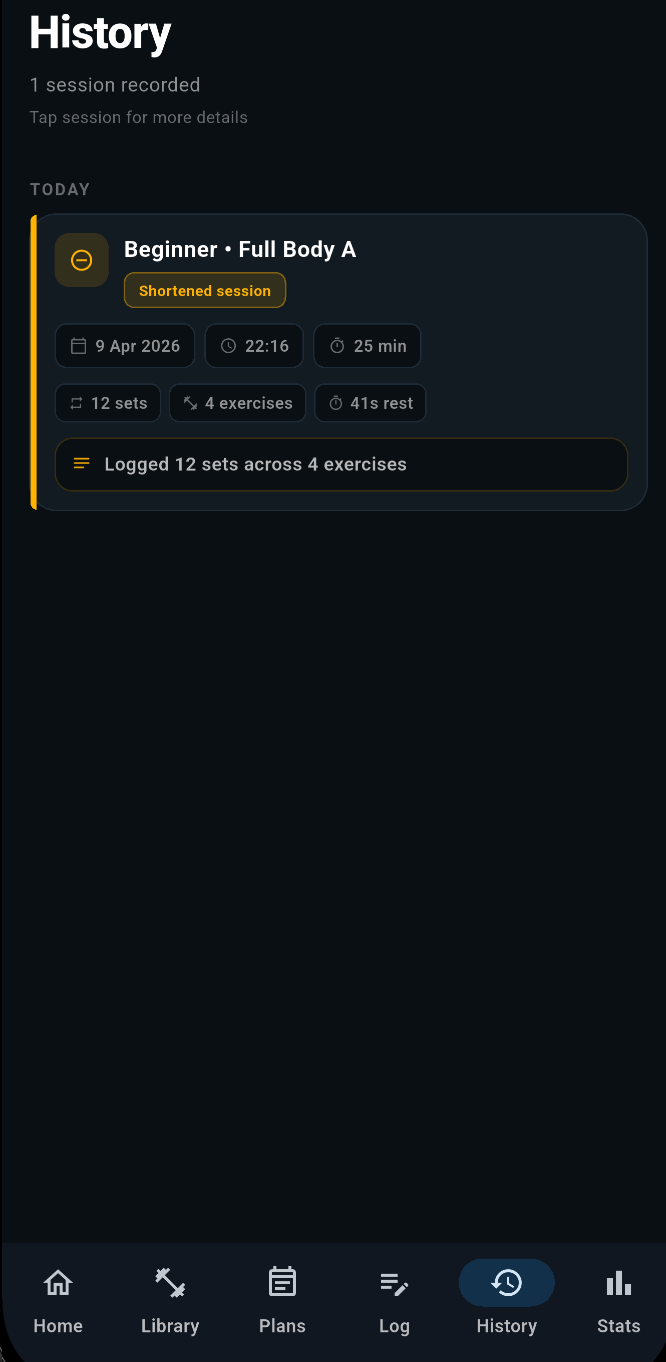
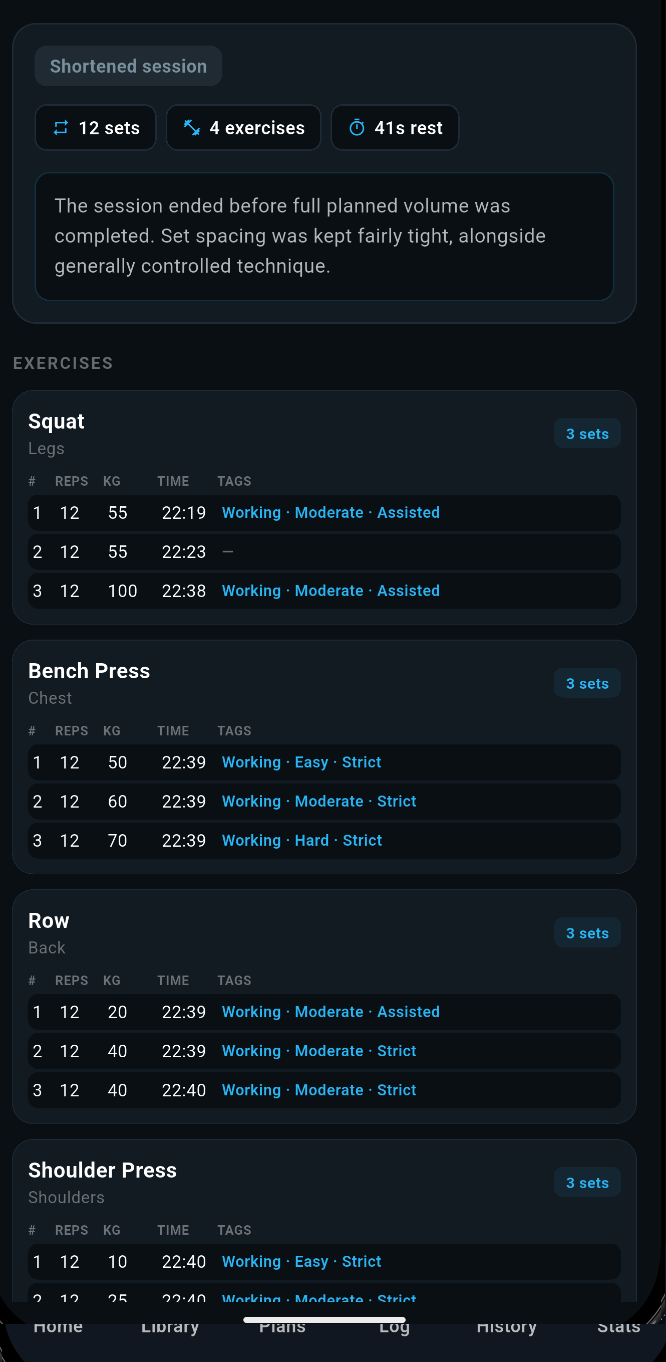
How do I review workout history?
Overview
Your workout history lets you look back at previous sessions, check what you did, and understand recent progress.
Step-by-step
- 1
Open the history section of the app.
- 2
Browse the list of completed workouts.
- 3
Open an individual session to view the exercises and sets recorded.
- 4
Compare recent sessions if you want to track consistency or progression.
Screenshots
Tip
Reviewing the last session before you train can help you choose sensible weights and targets.
How do I edit or delete a past workout?
Overview
If you logged a session incorrectly, you can open it again from history and make changes or remove it entirely.
Step-by-step
- 1
Go to your workout history.
- 2
Open the workout you want to change.
- 3
Choose the edit option and update the details you need to correct.
- 4
Save the updated workout once you are done.
- 5
If needed, use the delete option to remove the workout entirely.
Screenshots
Tip
It is worth checking edited sessions afterwards so you know the final record is accurate.
Troubleshooting
A few sensible first checks can solve many issues quickly and also make support requests far easier to investigate.
What should I do if something does not behave as expected?
Overview
Start with the basics first. Many issues are caused by a temporary app state, an outdated version, or a device setting that is blocking expected behaviour.
Step-by-step
- 1
Close and reopen the app.
- 2
Check for the latest version in the Google Play Store.
- 3
Repeat the steps slowly so you can see where the issue starts.
- 4
Check relevant device permissions or notification settings if the issue involves alerts.
- 5
Write down the exact sequence so you can report it clearly if needed.
Tip
Support requests are much easier to act on when they include the exact sequence of steps that triggers the problem.
The rest timer notifications are not appearing.
Overview
Timer alerts usually depend on notification permissions and background behaviour settings on the device.
Step-by-step
- 1
Open your device settings and find SetHarbour.
- 2
Confirm that notifications are enabled for the app.
- 3
Check battery optimisation or background restrictions.
- 4
Run a short timer test with the app open.
- 5
Run a second test with the phone locked to confirm alerts appear as expected.
Tip
Some devices are more aggressive about background restrictions, so battery settings are often worth checking.
Contact Support
If you still need help, use the support details below and include enough context for a useful reply.
How can I contact support?
Overview
Email support with a clear description of the issue and the steps that led to it. That makes it much easier to investigate.
Step-by-step
- 1
Write to hello@harbourapps.co.uk.
- 2
Explain what you were trying to do.
- 3
Include your device model and Android version if possible.
- 4
Describe what happened instead of what you expected.
- 5
Mention whether the issue happens every time or only occasionally.
Tip
Clear reports save time and usually lead to faster, more accurate support.
What privacy information should I know?
Overview
SetHarbour is designed with privacy in mind. Workout data stays on your device and is not uploaded to Harbour Apps servers for advertising purposes.
Step-by-step
- 1
Read the Privacy Policy on the website for the full explanation.
- 2
Review any permissions shown by the app.
- 3
Only enable the permissions required for the features you use.
- 4
Contact support if you want clarification about a permission or behaviour.
Tip
It is always reasonable to check what a permission is for before enabling it.
Contact Harbour Apps
Still need help with SetHarbour? Send a message with the issue, your device details, and what you were doing when it happened.
Helpful links
Privacy and data
SetHarbour is designed so workout data stays on your device. See the Privacy Policy for full details.
Built for future updates
Guide content and screenshots are driven by simple data structures so the page can be expanded without a full redesign.
Still need help with SetHarbour?
If you have checked the guide above and still need assistance, contact Harbour Apps support.
Email support